Referencing Your Gauge To a Fixed Point
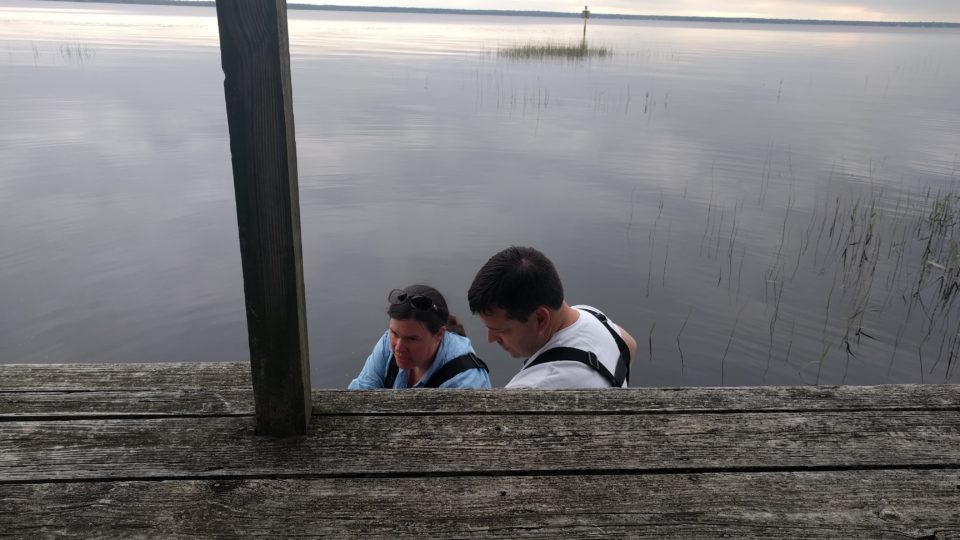
 LOCSS team members reference a gauge to a fixed point on the shore nearby using a line level, sting, and measuring tape
We take great care when installing lake gauges. We want to be sure they are near shore so they can be easily read, located in an area that will draw the attention of people passing by, and are installed at the correct depth so that we can capture the full annual range of lake heights in the lake. But we take one other step that is extremely important: We reference the height of each lake gauge to some fixed point nearby.
Gauges often need to be relocated or reinstalled in the same spot. Boats bump into the gauge, lakes freeze, docks need to be removed or rebuilt. When these things happen, a simple reinstallation of the gauge is needed to continue to measure lake heights. But how can we make sure that the gauge is reinstalled at the same level as it was before, so that we know, for instance, that a measured level of 1.50 feet before the lake froze is the same as a 1.50 foot measurement was taken after the lake froze and the gauge reset? If the gauge was referenced to a fixed point when it was initially installed, and referenced to the same point after the reinstallation, we can treat all of the measurements as a continuous data set.
If the LOCSS team installed the gauge, then we likely surveyed the gauge's elevation using GPS equipment. The measured elevation serves as our reference point, so that if the gauge needs to be reset or reinstalled, we just take another elevation measurement after the reinstallation so that we know how the levels before and after compare.
But not all of our gauges were installed by the LOCSS team, as some partners and citizen scientists installed them on their own and not everyone has surveying equipment to make elevation measurements. But that's okay, because referencing your lake gauge's height is easy for anyone to do.
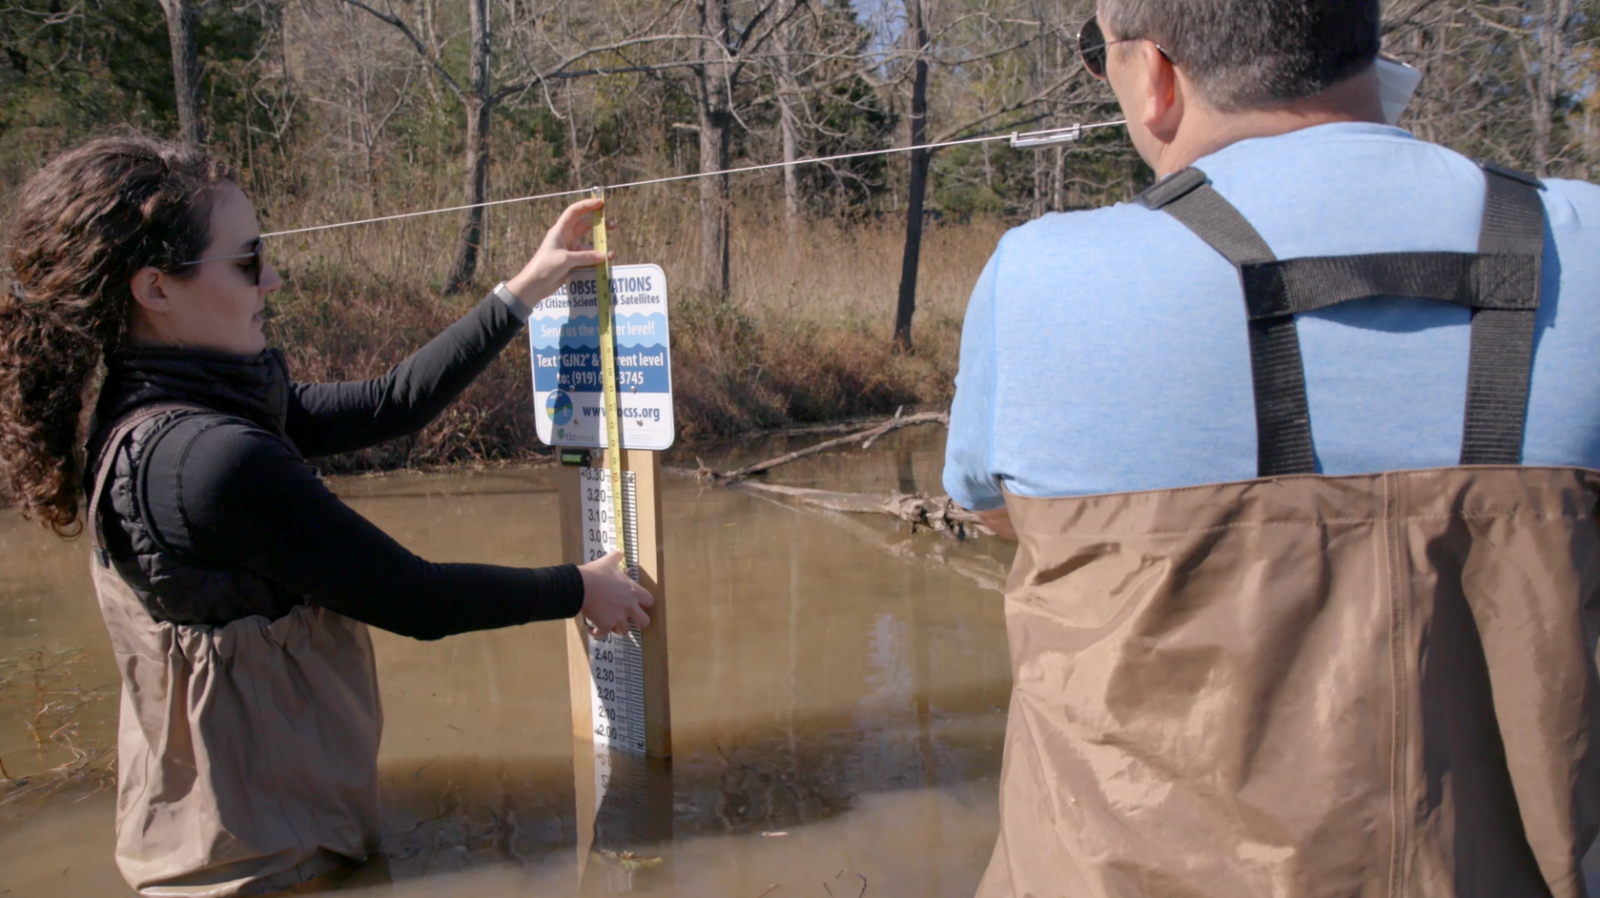
You will just need a line level, some string, an eye screw, and a tape measure. Then you just follow these simple steps:
- After installing your gauge, install your eye screw into a nearby fixed point at a height close to the height of the gauge. Be sure to choose a fixed point that will not move, such as a tree, post or pier.
- Tie the string to eye screw, and stretch it out over the water to the gauge, pulling it tight.
- Hang the line level on the string, and level the string.
- Measure the distance between the levelled string, and a marking on the gauge, such as the 3.30 foot mark. Be sure you are measuring the distance to the gauge itself, and not the sign, or board it's on, etc.
Note: The photo at the top of this article shows LOCSS team members doing this step. - Make note of this measurement, and email it to [email protected]. In your email, be sure to include your lake name, the gauge ID (4 digit code listed on the sign), a description of the fixed point chosen and this measurement.
For Example: "Brumley South Pond, Gauge ID GJN2, The eye screw in the oak tree to the south is 18" above the 3.30 mark on the gauge" - Leave the eye screw in the fixed point permanently so that it can be used if in the future.
These steps should be done: When the gauge is first installed; Just before removing the gauge from the water (in cases where lakes freeze); Any time after reinstalling or resetting the gauge.
The LOCSS team will use this information to make sure that all of the lake height measurements will display properly on each lake's web page.
More information on how reference your gauge to a fixed point can be found in our Gauge Installation Video. And if you have any questions, please reach out to us at [email protected].
LOCSS News
We share stories about the lakes in our study, our partners and volunteer citizen scientists, as well as interesting results from our research.